Vulnserver Part 0 - Overview
-
Vulnserver is a vulnerable TCP socket server written in C. You can use it to practise Windows x86 stack based buffer overflows.
You can get it over here on github.
The server application offers several different buffer overflows for you to exploit. If you run the server on a Windows machine and connect to it via netcat, then you can see the available buffer overflows by typing the HELP command followed by pressing enter:
$ nc 10.0.2.74 9999
Welcome to Vulnerable Server! Enter HELP for help.
HELP
Valid Commands:
HELP
STATS [stat_value]
RTIME [rtime_value]
LTIME [ltime_value]
SRUN [srun_value]
TRUN [trun_value]
GMON [gmon_value]
GDOG [gdog_value]
KSTET [kstet_value]
GTER [gter_value]
HTER [hter_value]
LTER [lter_value]
KSTAN [lstan_value]
EXIT
Here is an overview of the ones I have explored:
- TRUN - Simple stack based buffer overflow with a little fuzzing
- GMON - Structured Exception Handler (SEH)
- HTER - The input gets mangled
- KSTET - Egg Hunting
- GTER - More Egg Hunting / Socket Re-use
- LTER - Bad Char Galore
The TRUN command is probably the easiest of the available buffer overflows. So that is where we will start.
Setup
In the text below I will describe an example network lab setup and give an overview of the Immunity Debugger. You can skip all of this if you already have a home lab and know how to use a debugger.
Virtual Machines
We will use a Linux Virtual Machine as our attack machine (I used Kali Linux) and a Windows 10 VM as the target. We will run the vulnserver and the debugger on that Windows VM. I used VirtualBox in order to set up my lab environment, but you can also use VMware or any other hypervisor.
Obligatory Disclaimer: Make sure to only run vulnserver in your own home lab. We are obviously creating a vulnerable machine here. If you and me can exploit it, then so can others.
You can get free Windows 10 VMs for developers on the Microsoft Website. These VMs expire after 90 days starting with the first boot, so make sure to create a snapshot before starting the VM for the first time.
The default credentials are:
- user:
IEUser - pass:
Passw0rd!
It is a good idea to deactivate Windows Defender and the Windows Firewall after starting the VM. Antivirus evasion is not part of this tutorial. Beware that the real-time protection will enable itself again after the next reboot.
Please make sure that the two VMs have valid IP addresses configured and can communicate with one another.
Debugger
We will use Immunity Debugger in order to debug the vulnserver while we exploit it. The debugger allows us to see what exactly happens on the stack. This debugger is also used in the OSCP PWK course.
When you download Immunity Debugger it will ask you for your personal info, but you can just enter generic gibberish and press download. The download should then start immediately.
- Install Immunity Debugger on the Windows VM
- Do not install the Python 2.7 that comes with Immunity, but rather the most recent version (at the time of writing it was 2.7.18). Make sure you install the x86 (32bit) version.
- Download mona.py and copy it into:
"C:\Program Files (x86)\Immunity Inc\PyCommand\" - Download vulnserver.exe (don't forget to also download the essfunc.dll file)
The mona.py file adds useful new functions to Immunity that are geared specifically towards binary exploitation.
On your Linux VM set up the samba server. We will use it for convenient file transfers between the two machines.
Newer versions of Windows 10 block guest login shares (anonymous login without password) by default, so either set a password on your SMB share or deactivate this security feature on the Windows VM.
We will write our exploits in Python3. It should come pre-installed on most modern distros and definitely does on Kali Linux.
Running Immunity
Start Immunity on the Windows VM.
File -> Open -> Select vulnserver.exe in the file explorer
Press the Start button (or press F9)
A terminal should open with the following message:
Starting vulnserver version 1.00
Called essential function dll version 1.00

This is vulnerable software!
Do not allow access from untrusted systems or networks!

Waiting for client connections...
If it crashes on start, then you probably forgot to put the essfunc.dll file in the same directory as the vulnserver.exe binary.
The vulnserver will listen on TCP port 9999 for incomming connections.
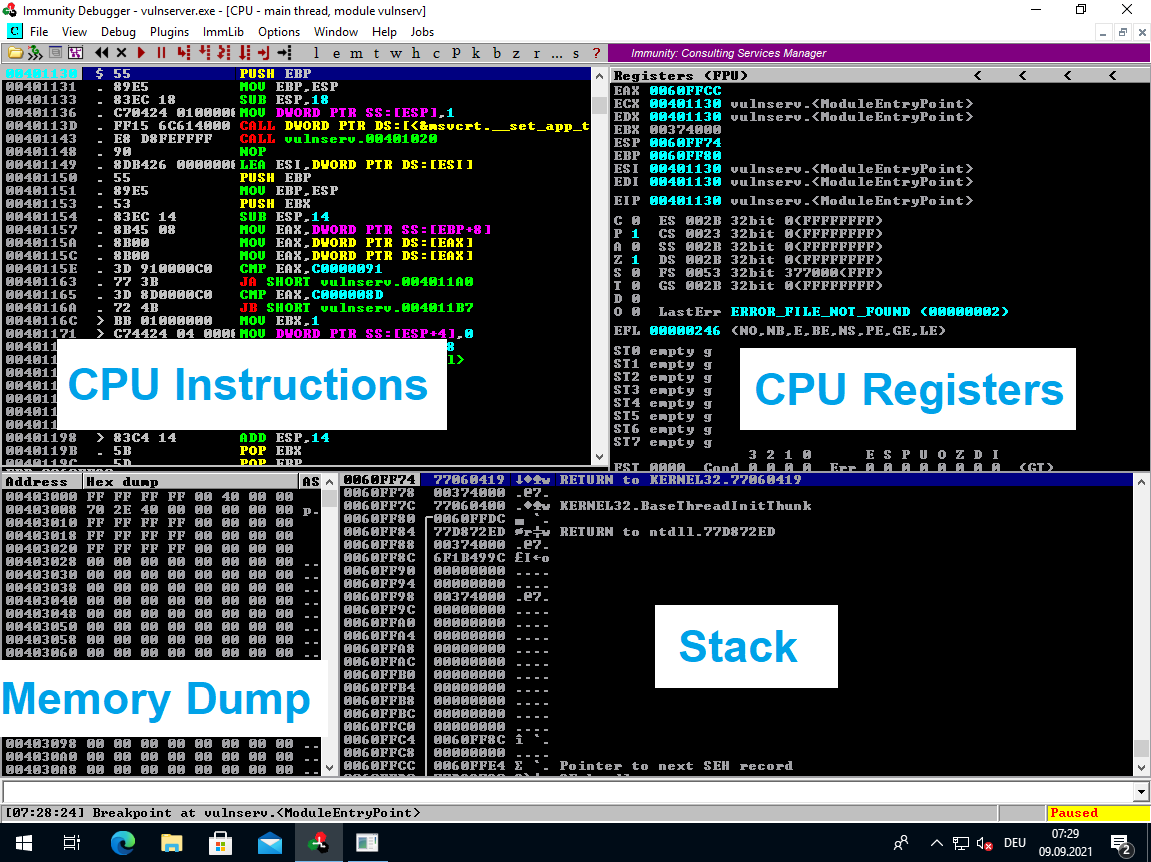
Immunity Overview
The default CPU view of Immunity is split into four parts:
Common Immunity Commands
You can pause/unpause the running execution using the <F9> button on your keyboard (or by using the red Play/Pause buttons in the menu).
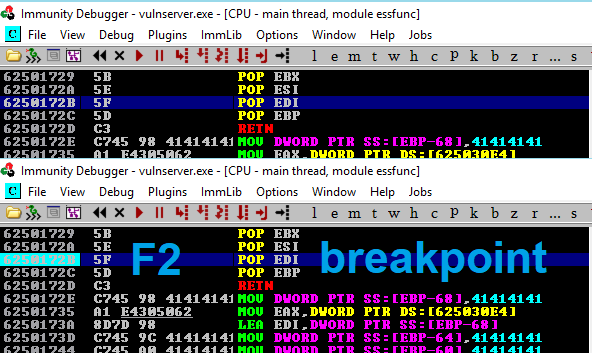
<F2> toggles a breakpoint on the selected address.
You can reset the program by using the black rewind button in the upper menu [<<].
If you are in paused mode (after hitting a breakpoint for example), then you can step through the next commands individually with <F7>.
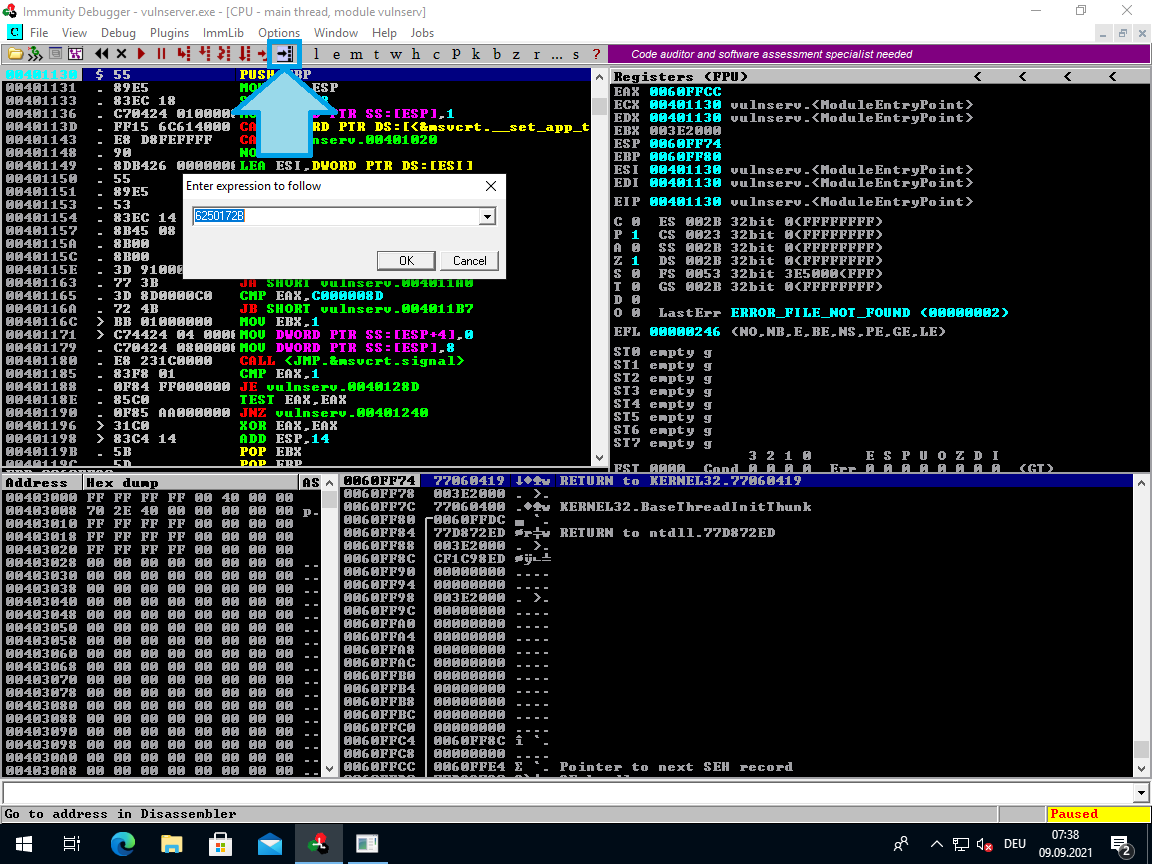
If you want to jump to a specific address in order to look at the code/data or set a breakpoint on it, then you can do so with the Black Arrow button in the menubar. In the pop-up window enter the address in hexadecimal (without 0x in front) and it should jump to your desired address.
If you are doing an SEH based buffer overflow and the debugger stopped on an exception, then you can resume execution using <Shift> + <F9>
You can see the SEH chain by pressing <Alt> + <S>.
Common Mona Commands
See available loaded modules and their respective protections:
!mona modules
Find a byte sequence in a module:
!mona find -s "\xff\xe4" -m "vulnserver.exe"
Compare file content to stack content. E.g. in order to check bad characters. The -a is the start address for the comparison:
!mona compare -f Y:\badchars.bin -t raw -a 0111F9CC
Find POP POP RET gadget for SEH:
!mona seh